Studio practice
Cabinet practice
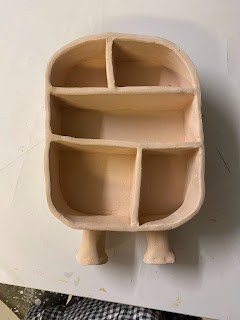
When thinking about my project aims I knew I needed to create a cabinet but I was not quite sure how to make it and what to make it out of. I was originally thinking about a wooden cabinet but I just felt it to be a very typical medium to use, I had a think and came up with the idea of ceramic cabinets. When I came up with this idea I immediately knew that was the route I wanted to go down, for one reason I really like working with clay but I also felt it to be a quite whimsical idea, something that would fit with my idea of value and curiosity really well. So I was sure this was the idea I wanted to do but there was also a lot of practical things to work out when creating them. How to make them structurally ok. How would I attach them to the wall without damaging them. How big could they actually be. Firing times. So with all these things to work out I knew it was best to make a practice cabinet first.


Comments
Post a Comment